


This is from a Volvo Owner Steve Ringlee on LEATHERIQUE
George:
Here is the writeup I posted at www.brickboard.com, which you may use or
edit as you see fit:
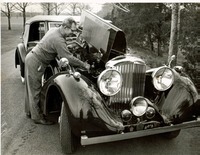
Steve Ringlee
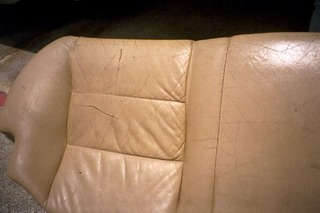
My kid's 940 was owned by a guy who took good care of everything in the
car EXCEPT the driver's seat. No leather treatments, ever, so it was
cracked at the surface, with dye failure, and looked very bad. The side
fabric at the frame edge was also torn, so the seat was beginning to
sag. We finally decided to pull the seat and completely rebuild the
bottom, using the Leatherique prep/dye/treatment kit
(www.leatherique.com) on all the leather and a new piece of Volvo OEM
seat foam. I wasn't sure it needed the foam, but figured that I would do
this task exactly once in my life.
We pulled the seat, using the green Volvo manual procedures. Peter and I
pulled off the leather cover, took it to an upholstery shop and had them
stitch reinforcing canvas at the fabric side panels where they were
torn. As it happened, the seat didn't need the new foam. I can't
believe how robust the Volvo seat foam is. We then reassembled it with
the new foam and applied the Leatherique treatment. After using the
Rejuvenator oil as a pre-treat, then sanding and cleaning the surface
with Pristine Clean and the Solvent Prep, we filled the he surface
cracks and blemishes with the Crack filler, and prepped and re-dyed it.
Spectacular results: looks like a brand new seat. Total cost was: $120
for the foam from Verrigni plus $120 for the Leatherique kit (sufficient
for two full cars, by the way.)
Here is the diassembly and reassembly procedure for Volvo 700/900 cars:
Front Seat Bottom Foam Replacement
1) Remove seat from car by unscrewing the four bolts securing each
corner of the tracks. The front outboard bolt is covered by a plastic
molding which is unscrewed. The rear screws are covered with a plastic
surround; pry outwards gently on the sides and pull them out. Unplug the
seat heater and power seat connections at the front corner. Unscrew the
side of the plastic pocket. Remove the seat belt at the side seat frame.
Pull the entire seat assembly, including tracks, back as far as it will
go. Lever up the rear tracks over the metal detent if they catch at the
back. Then move the entire assembly forward five millimeters to locate
the locking keys with the removal holes. Pull upwards to unlock the
seat. This may take some rocking and moving. Each track has a locking
pin in the middle of the track, securing it to the body structure.
2) Study/memorize seat covering at front and back, seat springs, wire
grid, wiring, foam and upholstery for ease of reassembly, damage and
possibly for need of more parts than you have on hand. Study the seat
heater wiring and unplug the underseat connections to the heaters. Do
one seat at a time so you have the other at hand as a model.
3) The 700/900 front bottom cushion is held on to the frame by two
spring steel bars inserted into the covering flaps at front and back,
and two wire clips in the front. The bars are inserted into the end of
the covering material, fit into holes in the side frames, and are
clipped to the seat bars with round spring clips. To remove them, first
pull off the round clips, then bend the bars until they pop out of the
seat frames at the sides. Pull the bars out of the material (if they
will come easily) and push the rear material forward under the seat
back. The wire clips are clipped from the side frames into the
second-from-the-front hog ring positions under the seat foam. Use needle
nose pliers to pull these out from the cushion bar. The bottom cushion
then pulls away from the frame. Watch out for the seat heater wiring:
don't yank it out when pulling off the cushion.
4) You will see two hog rings beneath at the back, holding the rear of
the seat heater in position to the bottom wire grid. Remove these.
5) At minimum you will need new foam. (You may find good used foam in
a wrecker. Good luck. It may stink. ) Get the best VCOA discount you can
from a Volvo dealer or go to a reseller (IPD, RPR, Borton, Verrigni.
Editor's note: around $120 for the bottom cushion from Verrigni Marine).
Study the foam and the side stiffener rods. The covering material is
secured to the foam with hog rings at each side, tied into stiffening
rods molded into the bottom of the foam.
6) You may be missing springs. Some of the well stocked hardware
stores sell almost perfect matches (in some cases better springs).
7) You may need a new wire support grid, which you can buy from RPR or
Borton's. You may also need a seat heater, but don’t buy one until you
open the seat up. It may be repairable. Mine was - the connector to the
thermostat was broken - I soldered the wire to a new spade connector and
the thing works great.
8) Remove the five hog rings on each side that hold the seat covering
to the cushion. They make special pliers for these but an assortment of
wire cutters/pliers/vise grips/super grabbers will work. [Tip from Jake
Fournier:] I pushed the end of a closed needle-nose pliers into the ring
and opened the pliers to force open the hogrings; wear eye protection -
one of those sharp little buggers nearly got me!
9) Remove the spring steel slide bar through front upholstery holder
strip. (A thin piece of steel about the thickness and width of a hack
saw blade). It pops right out and slides out of the fabric/leather.
10) Now peel back the front of the upholstery carefully to expose the
foam.
11) You will see two hog rings holding the seat heater to the front of
the foam cushion. Remove these rings.
12) Now the fabric/leather should peel all the way back to expose the
seat heater grid. And the foam should come out of the covering.
13) Your seat heater is held to the middle of the foam by two hog
rings in the slot in the middle. Remove these rings. If your seat heater
wasn’t working replace it/ trouble shoot it now.
14) Clean all the dirt and foam bits out of the seat frame and power
seat mechanism with rags and compressed air. Clean the fabric upholstery
cover at this time: laundry or dry clean (not leather!).
15) Clean and lubricate the seat tracks and the power mechanisms.
Examine the side metal frames at the top where the hidden fabric part of
the cover rests: if there are any burrs, remove them with a file and
cover the edges with electrical tape to keep from cutting the fabric.
17) If the grid is shot or you are missing springs time to attack that
now. I simply cut the center wires out of the grid, since I had to
replace it anyway. (No need to stretch the springs to remove a bad
grid!!). You may need help stretching the springs back, the last couple
require some arm/wrist strength.
18) If the side felt upholstery is torn above the securing holes, take
it to an upholstery shop and have them stitch in a reinforcing canvas
strip so that it can be re-used.
19) Position the seat heater. Secure it with two hog rings at the
front, two in the middle slot (tied to the wire stiffener), and two at
the back underneath (tied to the bottom wire grid.) The electrical
connection wires hang free.
20) Re-attach the seat cover at each fabric hole to the side seat foam
stiffener. Don't bother with hog rings: use a heavy-duty tie wrap (not
the cheapie kind) per hole. Pull them tight while pulling the fabric
covering down over the foam, and push the square lock inward into the
foam so it does not rest on the seat frame. These ties/rings hold the
covering on the foam. There are five to each side.
21) Place the covered cushion back on the frame. Pull the back fabric
flap through (beneath the back cushion), insert the spring bar, wrap
around the rear seat frame bar, and insert the sides of the spring bar
into the holes in the side frames. Insert the rear round clip into the
carpet spring bar and then clip it onto the rear seat frame bar to
secure both the cover rear flap and the carpet.
22) Insert the wire clips into the seat cushion stiffener rods at hog
ring position two from the front. Using needle nose pliers, pull these
so they are reinserted into the side frames of the seat.
23) Insert the spring bar into the front flap, wrap around the front
bar, and insert the bar ends into the holes at the seat frame sides.
This holds the front of the cushion onto the frame and tensions the
covering. Add the round spring clips to secure the bar.
24) Clean and treat leather with Leatherique kit.
25) Plug the seat heater connections back together.
26) Reinstall the seat in the car and plug the seat heater in.
Re-torque the seat bolts and the seat belt to 35 ft-lbs.
27) Adjust the seat and enjoy!!!!